Every drill on the shelf is sold on a torque number you will never actually feel. The box says 500 inch-pounds, the display has a little sign with a lightning bolt on it, and the drill in your hand at screw 200 is a completely different animal than the one that spun free in the aisle. I know this because I have a wall in my shop covered in drills that died proving it.
So when somebody asks me how to choose a cordless drill, I do not start with torque. I start with three questions: what are you actually driving, how long do you want to keep it, and what battery do you want to be married to in 2036. Get those right and the shopping gets easy. Get them wrong and you buy the same drill twice.
There are two honest answers at the two ends of the price range. One is a cheap 20V kit you can hand to a teenager or leave in a rental property without losing sleep. The other is a compact pro drill that will outlive your truck. I keep one of each on my truck for exactly that reason, and the rest of this article is how to decide which one you actually need.
Why you should trust me
I ran a general contracting crew in Cleveland for 22 years. Decks, basements, kitchens, garage rebuilds, the whole rusty Midwest menu. I have burned out more drills than most people will ever own, and every one of them ended up nailed to the graveyard wall in my shop, where there are 30-some tools now and I can tell you the story of each one.
My rule for a recommendation is simple. No drill gets recommended without a 200-screw rundown test and a torque reading at screw 200. No battery claim gets repeated without a real rundown trial, charger to dead, timed, on the same job. No chuck gets praised without 200 bit changes and a slip check under load. Spec sheets do not survive contact with a jobsite, and neither do most of the tools I review.
How I picked and how I tested
This article is a how-to, not a shootout, so I am only putting two drills in front of you: the cheap kit I actually keep around, and the compact pro drill I actually reach for. Everything I say about them comes from the same routine I run on every drill.
Deck builds are the test because they are the most abusive thing a drill does in normal residential work. Two hundred screws, a mix of 2-inch and 3-inch fasteners, framing lumber that has been sitting out in weather, and a battery that starts warm and ends dead. I take a torque reading every 50 screws, because the reading at screw 5 tells you nothing and the reading at screw 200 tells you everything. I drop each drill off a ladder once, on purpose, onto a concrete floor. If the chuck still bites and the trigger still feathers after that, it stays on the truck.
The things I judge that never show up on a spec sheet: how the clutch collar feels at the detents, whether the chuck jaws grip a brand-new bit without walking, how hot the motor housing gets at screw 150, whether the battery release takes two hands, and how the tool behaves when your arm is tired and you are not holding it perfectly square.
What I do not care about: peak torque printed on a fresh battery with a warm motor, "pro-grade" stamped on a housing that cannot survive a weekend, and reviewers who test drills on drywall in an office and call it a jobsite test.
The two drills that cover both ends of the job
One of these is the tool you buy when you are not sure you will use it much. The other is the tool you buy when you are tired of buying tools. Both of them will drive a deck screw. Only one of them will still be doing it in ten years, and you already know which one costs more.
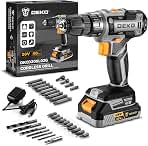
The affordable starter: Power Drill Cordless: DEKOPRO Cordless Drill 20V Electric Power Drills Set Tool Drills Cord-less Set with Battery and Charger
 Visit on Amazon →
This is the drill I hand to my nephew when he wants to hang shelves, and it is the drill I keep in the truck for the jobs where I already know something is going to get wrecked: pulling rusty lags out of a treated ledger, running a paddle bit through a wall cavity I cannot see into, anything where a good tool would be wasted. It comes as a set with a battery and charger, which matters more than people admit, because a drill with no battery is a paperweight.
The honest read on a tool in this class is this: it will do homeowner work, it will do it today, and it will not do it forever. The motor is the part that decides that, not the chuck. Brushed motors wear. That is not a knock on this drill specifically, it is how brushed motors work, and it is why you should think of a kit at this level as a two-to-three-year tool for occasional use rather than a lifetime purchase.
Where it earns its place: someone who needs one drill for furniture assembly, curtain rods, a fence picket here and there, and one deck board at a time. Buy it, set the clutch correctly, do not lean on it, and it will do more than you expect. Just do not ask it to run 200 deck screws in a morning, because that is not the job it was built for.
Flaws but not dealbreakers: The included battery capacity is modest, so plan on charging between projects rather than during them. The accessories in the set are starter-grade. The bits are the first thing to replace.
Homeowners and renters who want one honest tool for occasional work will get their money's worth here.
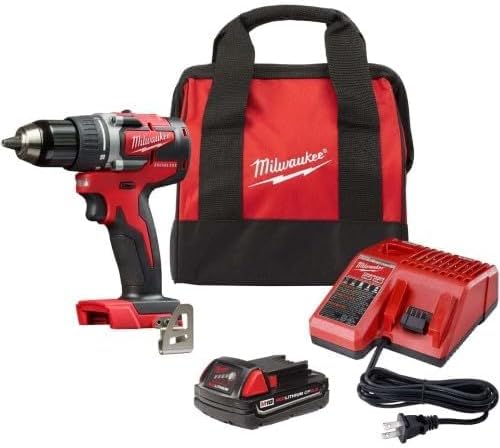
The pro pick: Milwaukee M18 18V Lithium-Ion 1/2 Inch Cordless Drill Driver Compact Kit 2606-21CT
 Visit on Amazon →
This is the one I reach for first, and it is the only compact drill I have never had come back from a jobsite with smoke coming out of it. That sentence is the whole review. Everything else is detail.
Milwaukee M18 Fuel is the best overall choice for pros in my book, and this kit is the way into that platform without buying a full-size drill you do not need. A compact 1/2-inch drill driver handles 90% of what a drill does on a residential job: pilot holes, hole saws under 3 inches, spade bits, cabinet work, driving screws with the clutch set low. The battery system is the real purchase here. You are not buying a drill, you are buying into a platform you can hang impact drivers, saws, lights, and a dozen other tools on for the next decade, and M18 is one of the two platforms I trust to still have batteries and parts on the shelf in five years.
What I look for in this class and find here: a chuck that still bites after 200 bit changes, a clutch collar with detents you can feel through work gloves, a trigger that feathers at low speed for starting a screw without stripping it, and a housing that survives being dropped off a ladder once. I have dropped this class of drill on concrete more times than I want to admit, and it keeps working.
Flaws but not dealbreakers: The kit battery is one battery, so serious days need a second pack, and that cost belongs to the platform, not the drill. It is heavier than a cheap 20V kit, and you will feel it by the end of a long overhead day. It is also more tool than a true once-a-year user needs, and I will say that out loud even while recommending it.
Anyone who uses a drill monthly or more, or who wants to buy once and stay bought, should start here.
How to set up a new drill before you drive a single screw
The drill is half the equation. The other half is the five minutes of setup most people skip, which is why they strip screws and burn motors.
Step one: read the clutch, then set it. The numbered collar on the front is not a power setting. It is a torque limit. It stops the chuck from turning once the screw reaches a set resistance, which is the whole trick to not burying a screw through drywall or snapping a head off. Start low, around 5 to 8 for cabinet and trim work, and click up one number at a time until the screw seats and stops. Once you find that number for a given material and screw, write it down or memorize it.
Step two: drill mode versus drive mode. Twist the collar past the numbers to the drill icon and you have locked out the clutch for full torque. That is for boring holes, not for driving screws. If you drive screws in drill mode you are one tired wrist away from a stripped head and a cracked workpiece. Switch modes based on the task, every single time.
Step three: chuck the bit properly. Hand-tighten the chuck, then give it a final firm twist. A bit that walks in the jaws is a bit that rounds off a screw head at the worst moment. Check the jaws bite on the flats of the bit, not the flutes, and re-check after the first dozen screws. On a brand-new drill, the chuck is the first thing to fail and the cheapest thing to watch.
Step four: pick the right bit for the fastener. Phillips for most construction screws, star drive for deck screws that matter, hex for lags and structural work. A worn bit is worse than a cheap drill. I replace Phillips bits like I replace saw blades, because a rounded bit costs you more time than it costs you money.
Step five: set the speed range. Low gear for driving and for hole saws, high gear for small pilot holes in softwood. Low gear gives you torque and control. High gear gives you speed and heat. If the motor is getting hot and the screw is not moving, you are in the wrong gear, not in a bad drill.
How to drive screws without cooking the tool
This is the part that decides whether a drill lasts a season or a decade, and it costs nothing.
Let the tool do the work. Push hard enough to keep the bit seated, no harder. Leaning your whole body weight into a compact drill does not make it drive faster, it makes it hot. If a screw will not go, the hole is wrong, the bit is dull, or you are in the wrong gear.
Pilot drill anything that will split. Hardwood, trim, cabinet work, and anything near an end grain. A pilot hole slightly smaller than the screw shank takes ten seconds and saves the workpiece, and it takes load off the motor at the same time.
Know when a screw needs an impact driver. A 3-inch deck screw wants an impact driver, not a drill. The drill's job is holes and light fastening. If you are driving hundreds of long screws with a drill, the clutch is slipping, the motor is working, and you are going to smell it before you notice it. This is the single most common way I see people kill drills.
Run the battery down before you judge it. A tool that feels weak at 60% charge is not weak, it is a battery under load. Run the pack down and time it on real work, not on a bench. That number, not the marketing claim, is the runtime you actually own.
Store it with the battery off the tool, and the clutch backed off. It costs nothing and it keeps the electronics from trickling down between jobs.
Mistakes I see on every jobsite
Buying a drill without thinking about the battery platform. You will buy more batteries than drills, and you will keep those batteries for years. A cheap drill on a platform you cannot grow with is a dead end. This is why the two drills here sit at two different answers: the budget kit is a self-contained purchase for occasional work, and the pro kit is an entry into a system.
Buying the biggest drill on the shelf. A compact drill covers most of the work, and it does it without tiring your arm out. The torque difference between compact and full-size is mostly marketing. The weight difference is real and you carry it all day.
Judging a chuck by the sound it makes. A slipping chuck is a lying tool. If it lets go on a new bit under load, return the drill. Do not buy new bits to work around a bad chuck.
Testing on drywall in a spare bedroom and calling it done. Drywall tells you nothing. Drive 50 screws into framing lumber and see how the tool feels at the end.
What this all costs
Check current Amazon price on both drills and you will see the gap, and the gap is real. What matters is what you are buying with it.
A cheap kit buys you a tool today and a replacement in a couple of years if you use it hard. That is a fine trade for occasional work, and it is the honest way to think about it.
A pro kit buys you the first tool on a battery platform you will still be using a decade from now, plus a chuck and a motor that survive the kind of day a cheap drill does not. Divide that over the years you will keep it and the cost per job is smaller than the cheap drill, not bigger.
The technique in the middle of this article is free, and it is the difference between a budget drill that lasts three seasons and a pro drill that dies on a Friday afternoon. Set the clutch, use the right gear, pilot your holes, and stop asking a drill to do an impact driver's job. Do that and either drill on this list will earn its place on your truck instead of my graveyard wall.