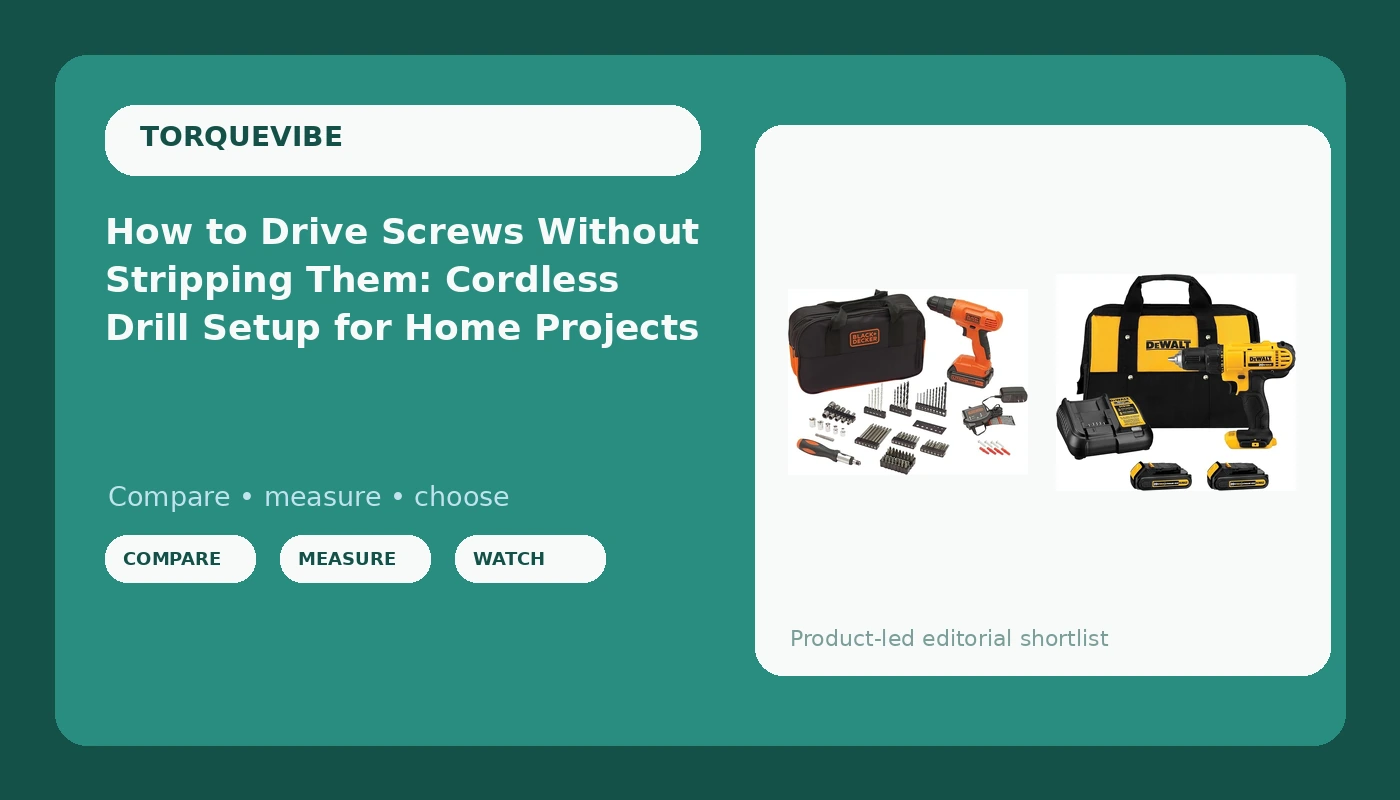
Most people who strip a screw head blame the screw. I have watched it happen on jobsites and in garages for a long time, and it is almost never the screw. It is the cordless drill setup: clutch collar wide open, trigger buried to the floor, a bit that is a size off or already rounded over, and a person leaning their shoulder into a tool that was doing the work without them.
A drill driver is three settings that have to agree with each other, and the box does not explain a single one of them. The clutch decides how much torque the drill will apply before it stops. The speed range decides whether you have slow muscle or fast spin. The bit decides whether that torque gets into the screw head or spins uselessly on top of it. Line those three up and a $60 drill drives screws better than a $200 drill with the clutch set wrong.
That is the whole article. Setup first, technique second, and the two drills I would actually put in a homeowner's hands at the end.
Why you should trust me
I ran my own general contracting crew in Cleveland for 22 years: decks, basements, kitchens, the whole rusty Midwest menu. In that stretch I burned out more drills than most people will own, and every one of them ended up on the graveyard wall in my shop. There are 30-some tools up there now and I can tell you the story of each one. Nothing earns a spot on that wall without earning its death.
I test drills the way a contractor uses them, not the way a showroom does. That means 200-screw deck builds, half-inch spade bits chewing through wet lumber, batteries charged up and run down until the charger gives up, and at least one drop off a ladder because jobsites are not labs. Spec sheets do not survive contact with a Monday morning, and neither do most of the tools I look at.
How I picked and how I tested
This is a technique article first. Two drills show up below because people keep asking what to buy before they learn how to use it, and the honest answer is that buying is the easy part.
Every tool that gets near my truck has to clear four gates. First, what does it feel like at screw 50, not screw 5? Second, does the chuck still bite after 200 bit changes under load? Third, can I still buy batteries and parts for it in five years? Fourth, does it survive one drop off a ladder and keep working?
I am not going to quote a torque number for either drill below that I have not measured myself. That is the point of the wall, and I am not going to hand you a number off a box. What I will tell you is what each kit includes, which battery platform it locks you into, which jobs it is built for, and where each one will frustrate you. You bring the technique, and either one of these will drive a screw straight all afternoon.
The two drills worth starting with
Here is the split. One kit is for the person whose tool collection is a drawer of mismatched screwdrivers. The other is for the person who already knows they will be abusing the tool and wants the platform underneath it to still exist in ten years. Both include the battery and the charger, which is the part people forget to add up.
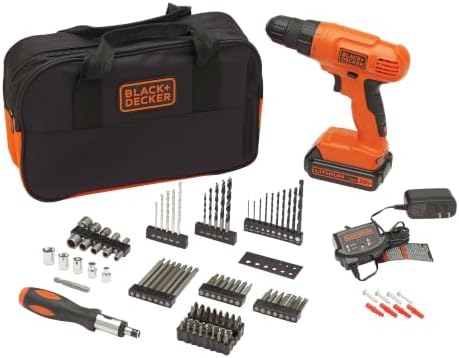
Budget pick: BLACK+DECKER 20V MAX* POWERCONNECT Cordless Drill Driver Kit with Drill Bit Set and Sockets, 100 pc. Tool Kit for Home, Battery and Charger Included, Orange (BDC120VA100)
 Visit on Amazon →
This is the kit I point a homeowner toward when the to-do list is a mix of curtain rods, a sagging fence gate, a flat-pack dresser, and one shelf that has been waiting since spring. It is a drill driver, a battery, a charger, and a 100-piece set of bits and sockets in one box. That last part matters more than people give it credit for, because a big share of stripped screw heads come from a bit that is either the wrong size or worn smooth, and this kit hands you a fresh one in the right size.
The battery is the part that decides whether this becomes a two-year tool or a ten-year tool. POWERCONNECT is Black+Decker's own 20V MAX system, and there is a full lineup of yard and shop tools hanging off it, so the battery keeps working on the weekends the drill stays in the bag. That is how you avoid the trap of buying a drill whose battery is discontinued the year after you buy it.
Two things to know before you order. It ships with one battery, so on the day you drill sixty holes, plan a charging break or set the drill down and come back after lunch. And this is a homeowner-power platform. It will drive deck screws, but if you are building a full deck on a Saturday, read the next entry.
Flaws but not dealbreakers: The included bit set is built for furniture assembly and light repairs. Buy one dedicated driver bit set before you take on anything structural. Check current Amazon price, because this class of kit moves around more than the pro tools do.
Anyone with a starter tool collection and a list of small repairs who wants one box to cover all of it will be happy here.
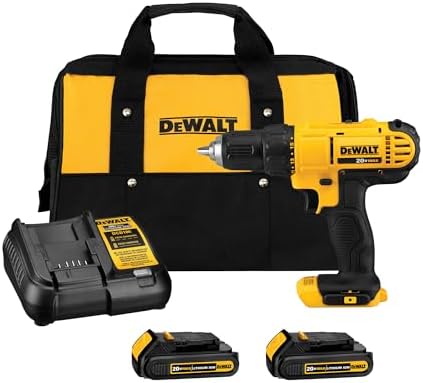
Our pick for work that fights back: DEWALT 20V Max Cordless Drill Driver Set, 2 Speed, High Performance Motor, Includes 2 XR 1.3Ah Li-Ion Batteries, Charger and Contractor Bag (DCD771C2)
 Visit on Amazon →
This is the kit that ends the argument for most people who actually work with their hands. Two XR batteries ship in the box, which is the single biggest upgrade over the budget kit: one battery runs the drill while the other sits on the charger, so a Saturday of projects does not stop for electrons. The two-speed transmission gives you a low range with real muscle for driving screws and turning hole saws, and a high range for pilot holes and light screws where you want speed instead of force.
The 20V MAX platform behind this drill is the reason I tell people to look here. The battery that runs this drill runs a long list of other tools, and that list is what you are really buying. Ten years from now you will still be married to that platform, so pick it deliberately.
One warning that saves people money and arguments: Black+Decker POWERCONNECT and DeWalt 20V MAX are separate systems with separate batteries, despite both wearing 20V MAX on the label. Nothing crosses over. Pick the platform, not the drill.
Flaws but not dealbreakers: This is DeWalt's value workhorse, not the flagship tier. The 1.3Ah XR packs are compact and light, which is great for overhead work and a shelf install, but a full day of heavy drilling will want bigger packs from the same line. Check current Amazon price before you commit, then read the technique below before you run your first screw.
Anyone who wants one drill that can frame, hang, and repair without being babied should start here.
The actual driving workflow
Now the part that matters no matter which drill you own. This works on any drill driver with an adjustable clutch.
Step one: Read the screw. Screw length, screw head type, and what it is going into. A 3-inch deck screw into wet pressure-treated lumber is a different job from a 1-inch screw into a pine cabinet. Most stripped screws start with someone skipping this step entirely.
Step two: Set the clutch before the first screw. The clutch collar is the numbered ring behind the chuck. The numbers are torque limits, and when the drill hits the limit, the clutch ratchets and the chuck stops spinning instead of driving the head through the wood. Start in the middle of the range, around 5 to 8 on most drills. Drive a test screw into scrap of the same material. If the clutch ratchets before the head seats, go up a click. If the head sinks and buries itself, go down a click. Now you know your number before you touch the real project.
Step three: Pick the speed range and let the motor work. Low range is for driving screws and turning big bits. High range is for small pilot holes and light work. Then use the trigger like a dimmer switch, not an on and off switch. Feather it. Let the gearbox and the motor do the work. The person leaning their whole shoulder into the back of the drill is the person who cams out and rounds the head.
Step four: Drill a pilot hole. The pilot bit should be about the diameter of the screw's shank, not the diameter of its threads. In softwood you can often skip it. In hardwood, in anything near an edge, and in anything you cannot afford to split, drill it. This one habit prevents more split boards than every clamp and wood screw trick combined.
Step five: Countersink if the head has to sit flush. A countersink bit takes ten seconds and keeps the drill from trying to force a flat head into solid wood, which is another way heads get stripped.
Step six: Seat the bit all the way into the screw head. Not halfway. All the way. Push the drill forward until the bit bottoms out in the recess, then keep light forward pressure through the whole drive so the bit cannot climb out.
Step seven: Stop when the clutch ratchets. That rattling sound is the tool telling you the screw is seated. Do not give it one more tap in drill mode. That one tap is how heads bury, drywall tears, and screws shear off at the shank.
Step eight: Backing a screw out. Drop to low range, drop the clutch two or three clicks below where it seated, and squeeze gently. A slow hand backs a screw out cleanly. A fast trigger strips the head and then you are drilling it out.
Fixing the four failures that send people back to the store
Stripped head. The bit has nothing left to grab. Put a wide rubber band over the head and press the bit in hard, or switch to a square drive or star bit that fits the damage, or step up to a screw extractor. Then fix the cause: worn bit, wrong size, or too much trigger.
Cam-out. The bit jumps out of the head while you drive. That is a worn bit or a bit that is one size off, and it is the number one reason bits come in packs of two. Replace it the moment it starts slipping instead of waiting for it to cost you a screw head.
Split board. You are driving into end grain, too close to an edge, or too fast with no pilot hole. Drill a pilot hole next time, keep screws an inch from any end, and back the clutch down a click so the head seats without wedging the wood apart.
Buried screw. The clutch was set too high for the material. Back it down two clicks, and if you have already buried one, drive the next screw slightly deeper on purpose and fill the first hole, because digging a buried head out of soft wood rarely ends well.
Battery habits that keep a drill alive in Cleveland
Batteries die from heat, cold, and sitting dead, in that order. Charge them at room temperature, not in a freezing garage. If you work in a cold shop, bring the battery in the house overnight instead of leaving it in the truck bed, because a cold pack will fake a low charge and then recover once it warms up. Do not leave a pack on the charger for weeks at a time. If a battery is going to sit for months, store it partway charged rather than fully drained.
The other habit is boring and it works: keep one battery on the tool and one on the charger. That is the real reason the DeWalt kit with two packs is easier to live with than a single-battery kit. Charging is not the problem. Standing around waiting for a charge is the problem.
Chuck and clutch maintenance that takes five minutes a year
Wipe the chuck jaws with a dry rag and blow the dust out of the vents with compressed air. Grit in the jaws is what makes a chuck start slipping on brand new bits. Keep the clutch collar moving through its full range once in a while so it does not seize from sawdust. Never use the drill body as a hammer, and never crank the chuck down on a bit that is already spinning. Store it in the bag, not loose in a bucket of screws.
A drill that is cleaned and stored dry will outlast the batteries you feed it, and the batteries are the only part you have to keep buying.
What this all costs
Both kits include a battery and a charger, so nothing is hidden behind the checkout counter. The Black+Decker is the lower-cost entry point, and the DeWalt is the step up, and the difference between them is not a feature list. It is how much work you can get through before you stop for a charge, and how deep the platform runs when you start adding tools.
Neither drill is the expensive part. The platform is. One battery purchase is a decision you live with for years, so buy into the system you want to own in 2036, not the one that is cheapest on a Tuesday.
What this article is not about
An impact driver is the right tool for long deck screws, and if that is your whole job, buy one with a quick-release collet instead of a chuck and skip the drill driver argument entirely. A corded drill is still the tool for a 4-inch hole saw through wet lumber, and mine has been in the shop for 20 years for exactly that reason. A 12-volt subcompact is a great second drill for cabinet work and a bad only drill for a homeowner with a fence to fix.
None of those belong in a beginner's first purchase. Buy the drill driver, learn the clutch, and the rest of the tool wall will make sense later.
That is the job. Set the clutch, pick the range, seat the bit, and let the tool work. Your drill was built to do this.