Most people think buying the drill is the decision. It isn't. The cordless drill jobsite power setup is the decision, and it is really two purchases stacked on top of each other: the tool you hang on a battery platform, and the thing that keeps that battery charged when the house you're working on doesn't have a live outlet yet.
I've watched guys burn a whole Saturday on this. Deck framed, joists in, and then the compact pack dies at screw 140 and there's no power on site. They stand around with their hands in their pockets waiting on a charger that's plugged into nothing.
I've been running a contracting crew out of Cleveland for 22 years, and the difference between a good tool day and a bad one is almost never horsepower. It's setup. Here's how I set up a drill and an on-site power source so a 200-screw build doesn't stall.
Why you should trust me
Twenty-two years of decks, basements, kitchens, and the whole rusty Midwest menu. I have a graveyard wall in my shop with 30-some dead tools on it: screwguns with melted brushes, a hammer drill that caught fire mid-pour, an impact driver that stripped its own anvil. Nothing gets on that wall without earning its death, and nothing gets recommended to you without surviving the same protocol I put every tool through.
That protocol is simple. A 200-screw rundown on a real deck build. A torque check at screw 200, not screw 5, because spec torque is measured on a warm battery with a fresh charge. Two hundred bit changes and a slip check under load, because a chuck that slips is a tool that lies. A rundown trial that runs a pack from full to dead with a stopwatch on it. And a drop off the second rung of a ladder, because jobsites are not labs.
I don't care what the box says. I care what the tool does at screw 200, and whether I can still buy batteries and parts for it in five years.
How I picked and how I tested
This guide covers two pieces of gear, and they do different jobs. One is the drill. The other is the power that keeps the drill running on a site with no live service.
The drill side is about the platform. The SKIL kit below is a 20V brushless tool with a flip head that converts between drilling and driving, a clutch collar, and a 2.0 Ah USB-C battery with a charger in the box. The power side is about volume: how many watt-hours you can carry to a site, and whether a battery charger can run off it.
When I evaluate a setup like this, I look at four things. Does the chuck still bite after 200 bit changes? Does the clutch actually ratchet at the setting it claims, or does it just spin? Can I still find batteries and parts for the platform in five years? And would I hand it to my apprentice on a Monday morning without a speech?
That last one matters more than any number on a spec sheet. If I have to explain a tool to a first-year guy, the tool is wrong.
What you need before you start
Before the drill comes out of the bag, get these lined up:
- A set of hex-shank driver bits and a set of twist or brad-point drill bits.
- The drill kit, with the battery charged and the charger within reach.
- A power source you can carry to a site with no live outlets.
- A work light, if you're working past 4 p.m. in October, which in Cleveland you will be.
- A torque meter, if you own one. If you don't, your arm is the meter, and you should trust it less than you do.
- A scrap of the actual material you're fastening into. Test on scrap, not on the finished face.
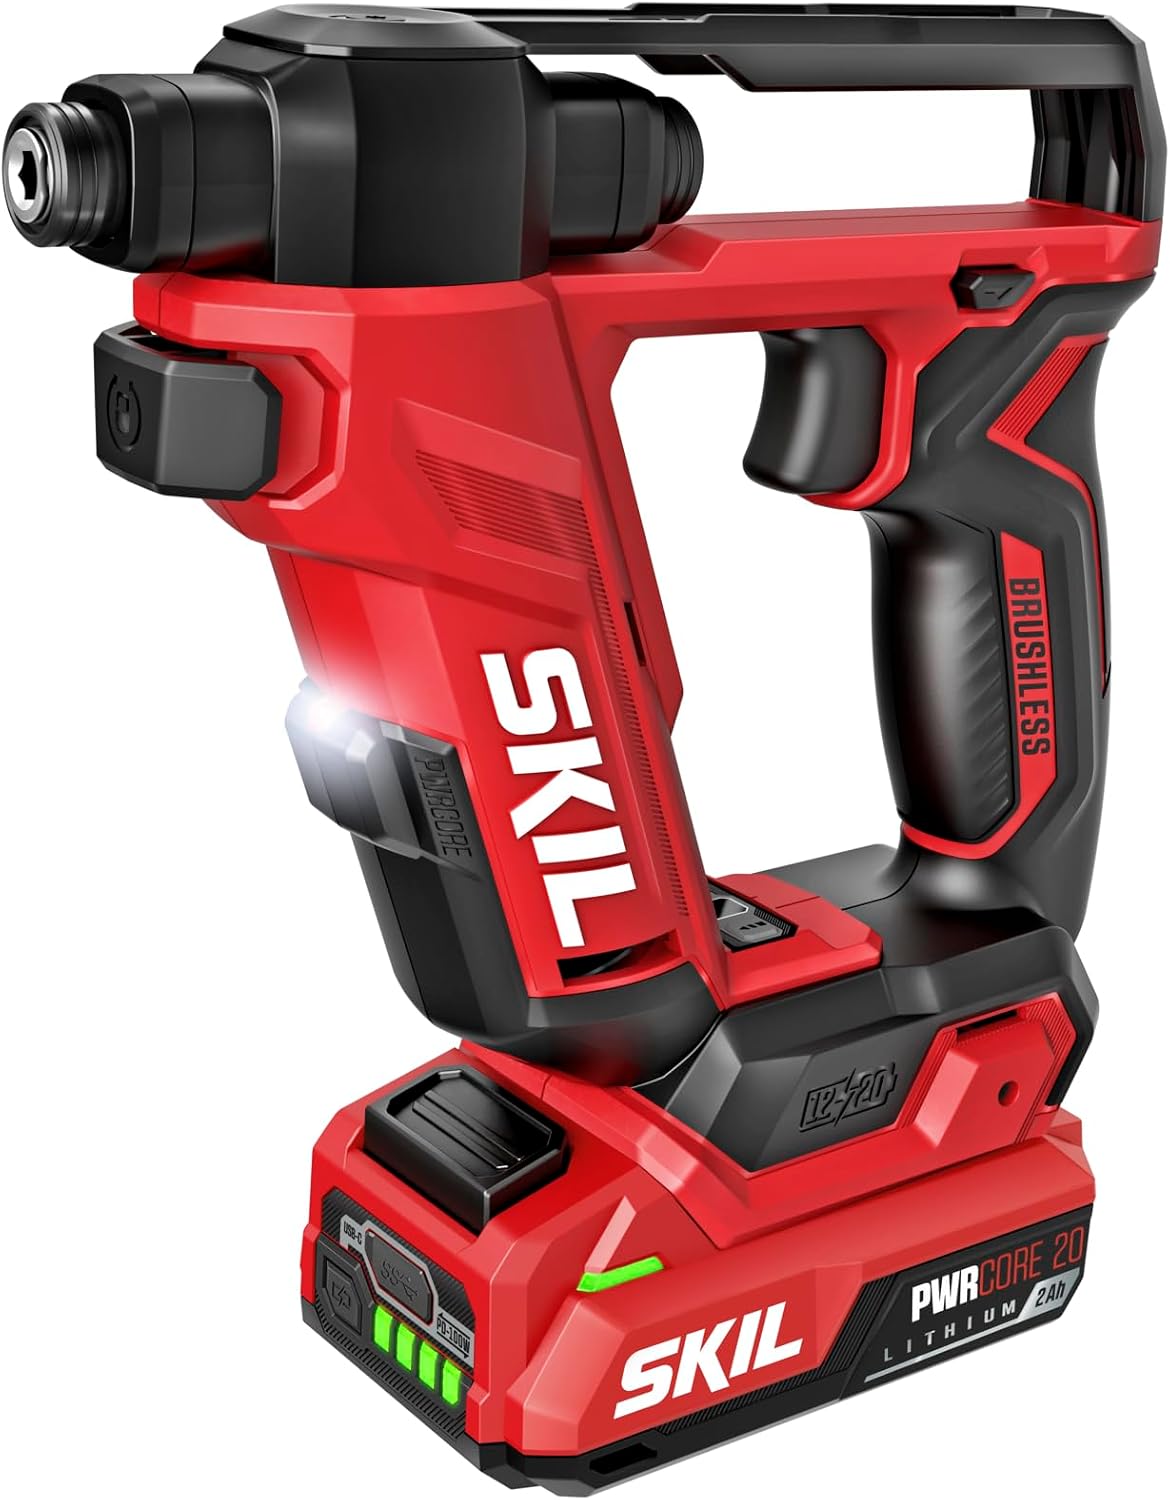
The drill: SKIL PWR CORE 20 Brushless 20V Flip Drill Driver Kit with Double Collect Flip Head, Torque Settings & Magnetic On-board Storage, Includes 2.0 Ah USB-C Battery and Charger - DL6300D-12
 Visit on Amazon →
The flip head is the feature that earns this kit a place in a how-to. On a deck build you're constantly swapping between a pilot hole and a fastener, and on a conventional drill that means two chucks, two tools, or a lot of hand-swapping bits. The double collect flip head lets you keep a drill bit on one end and a driver bit on the other and flip between them. The magnetic on-board storage is where the spare bits live so you're not digging through your apron with one glove on.
Two details to understand before you run it. First, the clutch collar is not decoration. It's the setting that stops the chuck from spinning at a set torque, and on trim and cabinet work it's the difference between a screw seated flush and a screw buried straight through the face of the material. Second, the 2.0 Ah pack that ships in the kit is a starter battery. It's enough for light work and it's the pack that comes in the box, but a full deck day wants more capacity than one compact pack. That's a platform conversation, not a drill conversation.
Flaws but not dealbreakers: The compact pack in the box is not a deck-build pack. Budget for a second, larger battery on the same platform if you're fastening all day. Brushless helps, but brushless doesn't create watt-hours out of nothing.
Anyone doing trim, cabinets, deck framing, or general punch-list work who wants one tool that drills and drives without a bit swap will get their money out of this kit.
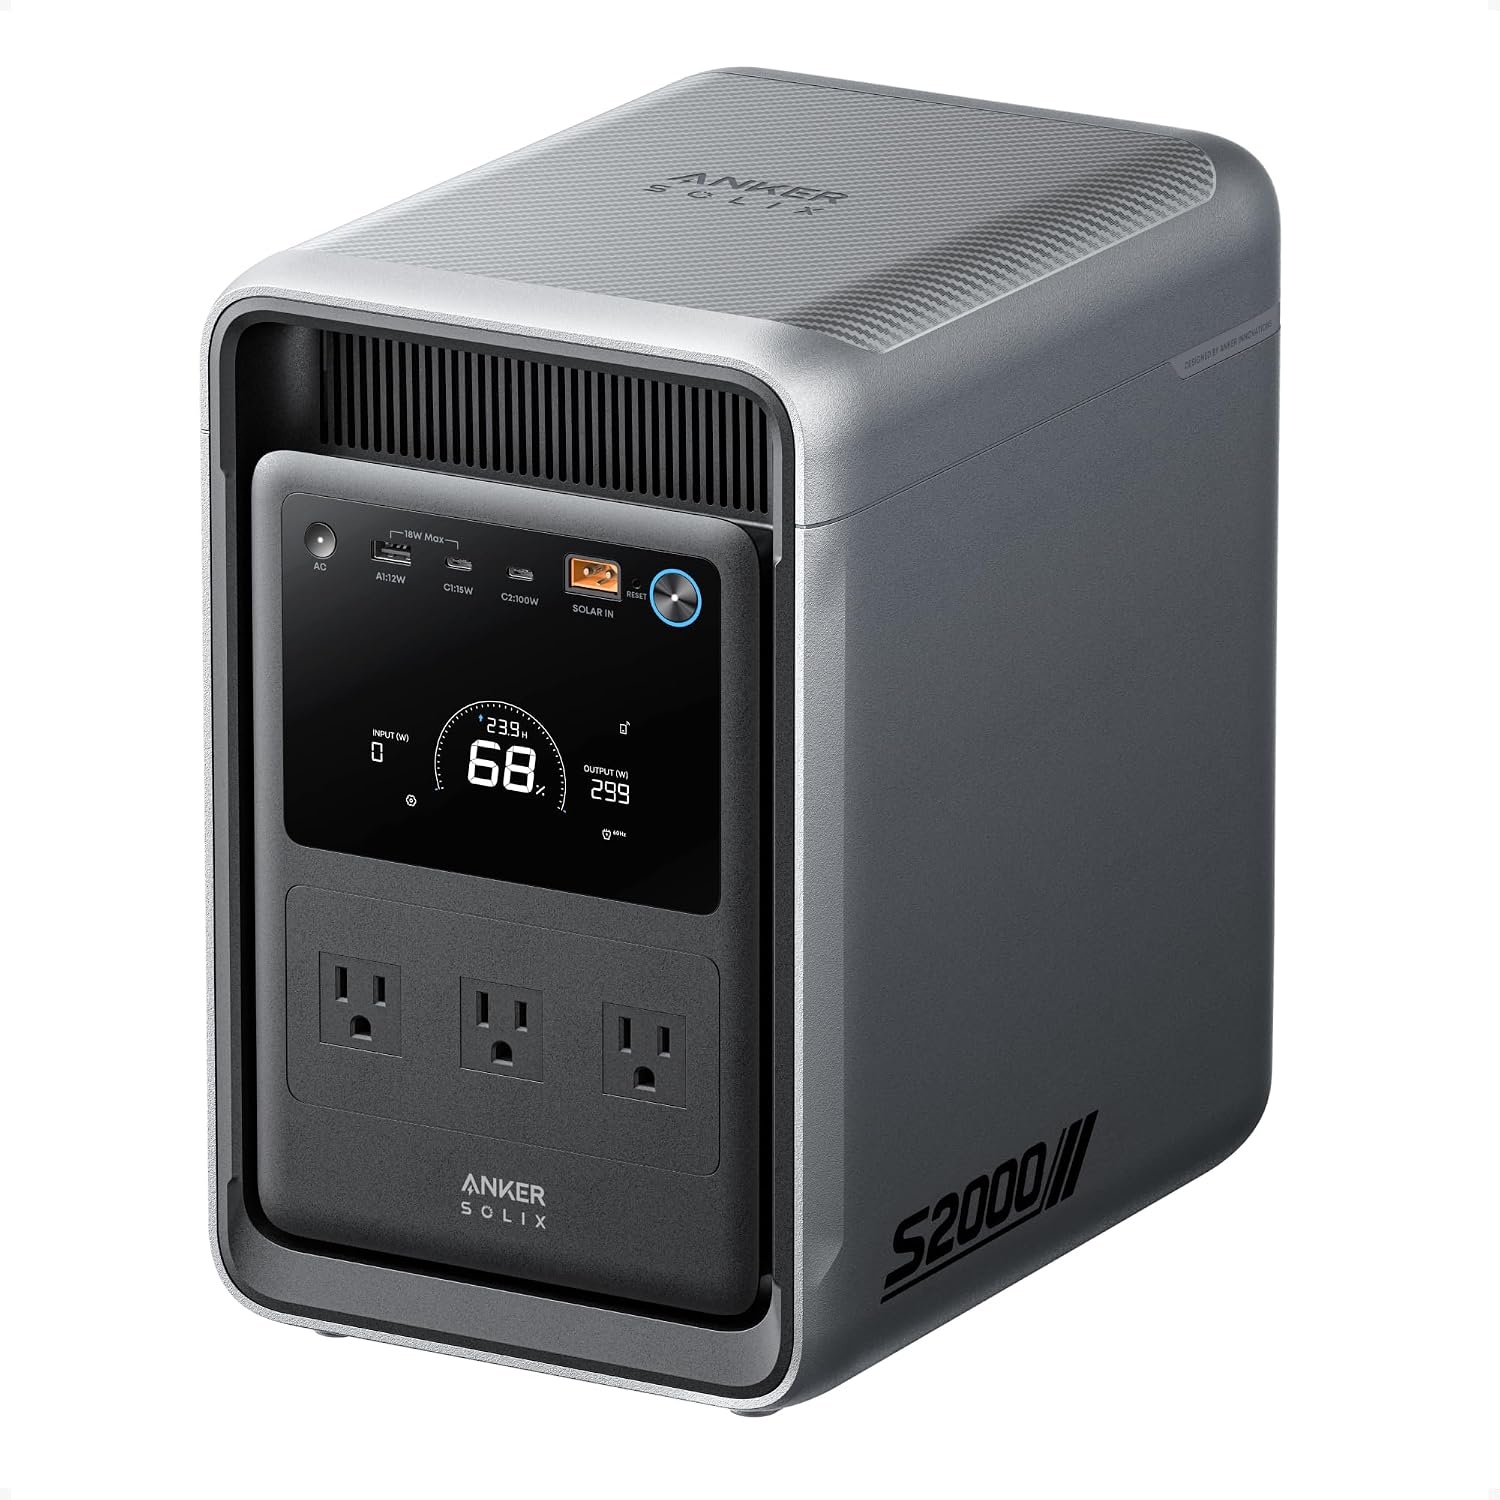
The power source: Anker SOLIX S2000 Portable Power Station, 2,010Wh, 3,000W Peak, Home Backup
 Visit on Amazon →
This is the piece most people never think about until they're standing on a job with no power. The S2000 carries 2,010Wh and 3,000W of peak output, and it has AC outlets you can plug a battery charger into. That turns a dead-service jobsite into a working one.
Here's how I use a station like this. It lives in the truck. On a remodel where the panel is pulled or the service isn't live yet, it runs the charger for the drill packs, a work light, and a phone. On a deck build in a backyard with no outlet within 100 feet, it's the difference between one battery and five. At home, it's the thing that keeps the sump pump and the fridge alive during a Northeast Ohio ice storm, which is the actual reason I stopped making fun of these things.
Two honest caveats. It is heavy, and you will notice it carrying it up a set of stairs. And it is a battery, not a generator. If you've got a crew of four running four chargers and a table saw, you want a generator. This is for the one-tool, one-light, one-charger reality of a residential punch list or a homeowner's weekend project.
Flaws but not dealbreakers: Capacity is finite. You're trading weight and cost for silence and no exhaust, and on a residential job that trade is usually the right one.
Anyone working on a property with no live power, or anyone who wants home backup that also earns its keep on the job, should look here first.
The step-by-step setup
Step one: Charge before you leave the shop. A pack charged the night before is worth more than any feature on the tool. Charge the drill battery and top off the power station at home. Charging on site costs you time you already paid for.
Step two: Set the clutch before the first screw. Pick the lowest clutch setting that will drive your fastener and test it on scrap. For trim and cabinets, start low and walk it up. For framing, you'll be near the top of the range. If the clutch ratchets, the screw is seated. If it keeps spinning, you've got it set too high and you're about to strip something.
Step three: Choose the right end of the flip head. Pilot hole first, always, when you're near end grain or a board edge. Flip to the driver side for the fastener. The flip head is not a gimmick, it's the reason you stop dropping bits in the grass.
Step four: Seat the bit properly. Three jaws, tightened all the way down, then a tug test. A bit that moves when you pull it will slip under load. If your chuck slips on day one, you've either got a bad chuck or a bit with a chewed shank. Throw the bit away first.
Step five: Pick your gear range. Low gear for torque, high gear for pilot holes. Running a 1/2-inch spade bit in high gear is how you cook a motor. Slow hands, fast work.
Step six: Stage the power station where you're working. Not at the truck. At the work. Run the charger off it, plug in the light, and keep the spare pack on the charger while you run the first one down. This is the whole point of the setup: one battery working, one battery charging, no downtime.
Step seven: Fasten in a rhythm. Run a row of pilot holes, then a row of fasteners. Switching between drilling and driving on every single screw is what kills your pace and your wrist. Work in passes.
Step eight: Know when the drill is the wrong tool. A 3-inch deck screw driven by a drill is a drill doing an impact driver's job. If you're building a deck, the drill makes the pilot holes and the impact driver sets the screws. A clutch-equipped drill will drive a lot of screws, but it will also cam out, strip heads, and wear your arm out doing it.
Where this setup falls short
The compact battery is the weak point of any kit like this, and I'll say it plainly. One 2.0 Ah pack is a starter pack. Plan on a second battery, and plan on a bigger one if you're fastening all day.
The power station is not a generator. It won't run a table saw and a crew's worth of chargers all afternoon. It runs the charger, the light, and the small stuff, and it does that quietly, which is worth something on a residential job at 7 a.m.
And the drill is a drill. It is not an impact driver. If your project is deck screws, lag bolts, or anything over about three inches into wet lumber, you want an impact driver for the fastening and the drill for the holes.
What this all costs
The drill kit is the smaller of the two purchases by a wide margin. The power station is the bigger check, and it's the one that pays you back in a different way: it's not just a jobsite tool, it's home backup for the ice storm in January.
The math I actually run is cost per year of service. A drill on a platform you can still buy batteries for in five years is cheap. A drill on a platform that disappears in two years is expensive no matter what you paid. Same with the power station. Buy the capacity once, keep it charged, and stop renting generators.
Check current Amazon price on both before you commit, because both of these go on sale more often than you'd think.
The short version
Charge the battery at home. Set the clutch on scrap before the first screw. Pilot hole, then fastener, flipping the head instead of swapping bits. Keep one pack working and one pack on the charger, and keep the charger plugged into a power source you brought with you. Test the chuck with a tug. Let the clutch ratchet instead of burying screws by feel.
That's the setup. None of it is complicated, and all of it is the difference between a Saturday deck build and a Sunday do-over.