Most people buy their first cordless drill the way they buy a blender. They grab the loudest box on the shelf, get it home, and hope for the best. Two weeks later the chuck slips on a deck screw, the battery quits halfway through a Saturday project, and the tool ends up on a shelf next to the paint cans.
I spent 22 years running a general contracting crew out of Cleveland, Ohio. Decks, basements, kitchens, the whole rusty Midwest menu. I have burned out more drills than most people will ever own, and every one of them is bolted to a wall in my shop. There are 30-some tools up there now and I can tell you the story of each one.
Picking a first cordless drill is not about the biggest torque number on the box. It comes down to three things: a chuck that bites, a motor that lasts, and a battery platform you can still buy into five years from now. Get those right and the drill outlives the project that made you buy it. Get them wrong and you are shopping again next spring.
Here is how I walk a first-timer through it, from the two drills worth considering to the setup steps that keep you from stripping screws on day one.
Why you should trust me
I ran my own crew for two decades. In that time I watched brushed motors smoke on three-inch deck screws, chucks slip on brand-new bits, and batteries die at the exact worst moment of a Friday afternoon. The graveyard wall in my shop started as a joke and turned into the most honest review system I know, because nothing earns a spot up there without dying first.
The standard I hold a drill to before I hand it to anyone: a 200-screw deck rundown, a torque check at screw 200, a couple hundred bit changes to test the chuck, and one drop off a ladder. If a tool cannot survive a Cleveland jobsite in February, I do not care what the box claims. Spec sheets do not survive contact with a jobsite, and neither do most of the tools I look at.
What actually matters on a drill
The chuck. A chuck that slips is a tool that lies. It does not matter how many inch-pounds the box advertises if the bit spins in the jaws under load. Look for a metal chuck, ideally 1/2 inch, and tighten it by hand with all three jaws instead of cranking on the sleeve with your whole arm.
Brushless or brushed. Brushless is not a marketing word. A brushless motor has no carbon brushes to wear out, which is usually the difference between a tool that lasts a season and a tool that lasts a decade. Brushed motors still have a place at the bottom of the price range, but if you plan to use the drill more than a few times a year, brushless pays for itself.
The battery platform. You are not buying a drill. You are buying into a family of tools that share one battery for the next ten years. Before you commit, count the tools you can realistically see yourself owning: an impact driver, a circular saw, a light, a blower. The platform is the real purchase and the drill is just the first thing you hang on it.
Clutch and speed control. The clutch is the adjustable collar behind the chuck. It stops the bit at a set torque so you do not bury a screw through drywall or strip the head. Two speed ranges matter too: low gear for driving screws, high gear for small holes in softwood.
Weight and balance. A compact drill beats a full-size one for about 90% of the work you will ever do. The torque difference is mostly marketing. The weight difference is real, especially when you are holding the tool overhead running curtain rod brackets.
Two drills I would hand a first-timer
The two drills below answer two different questions. One is for the person who owns nothing yet and needs a complete setup this weekend. The other is for the person who already has batteries on the shelf and wants a tool that will still be working in 2036.
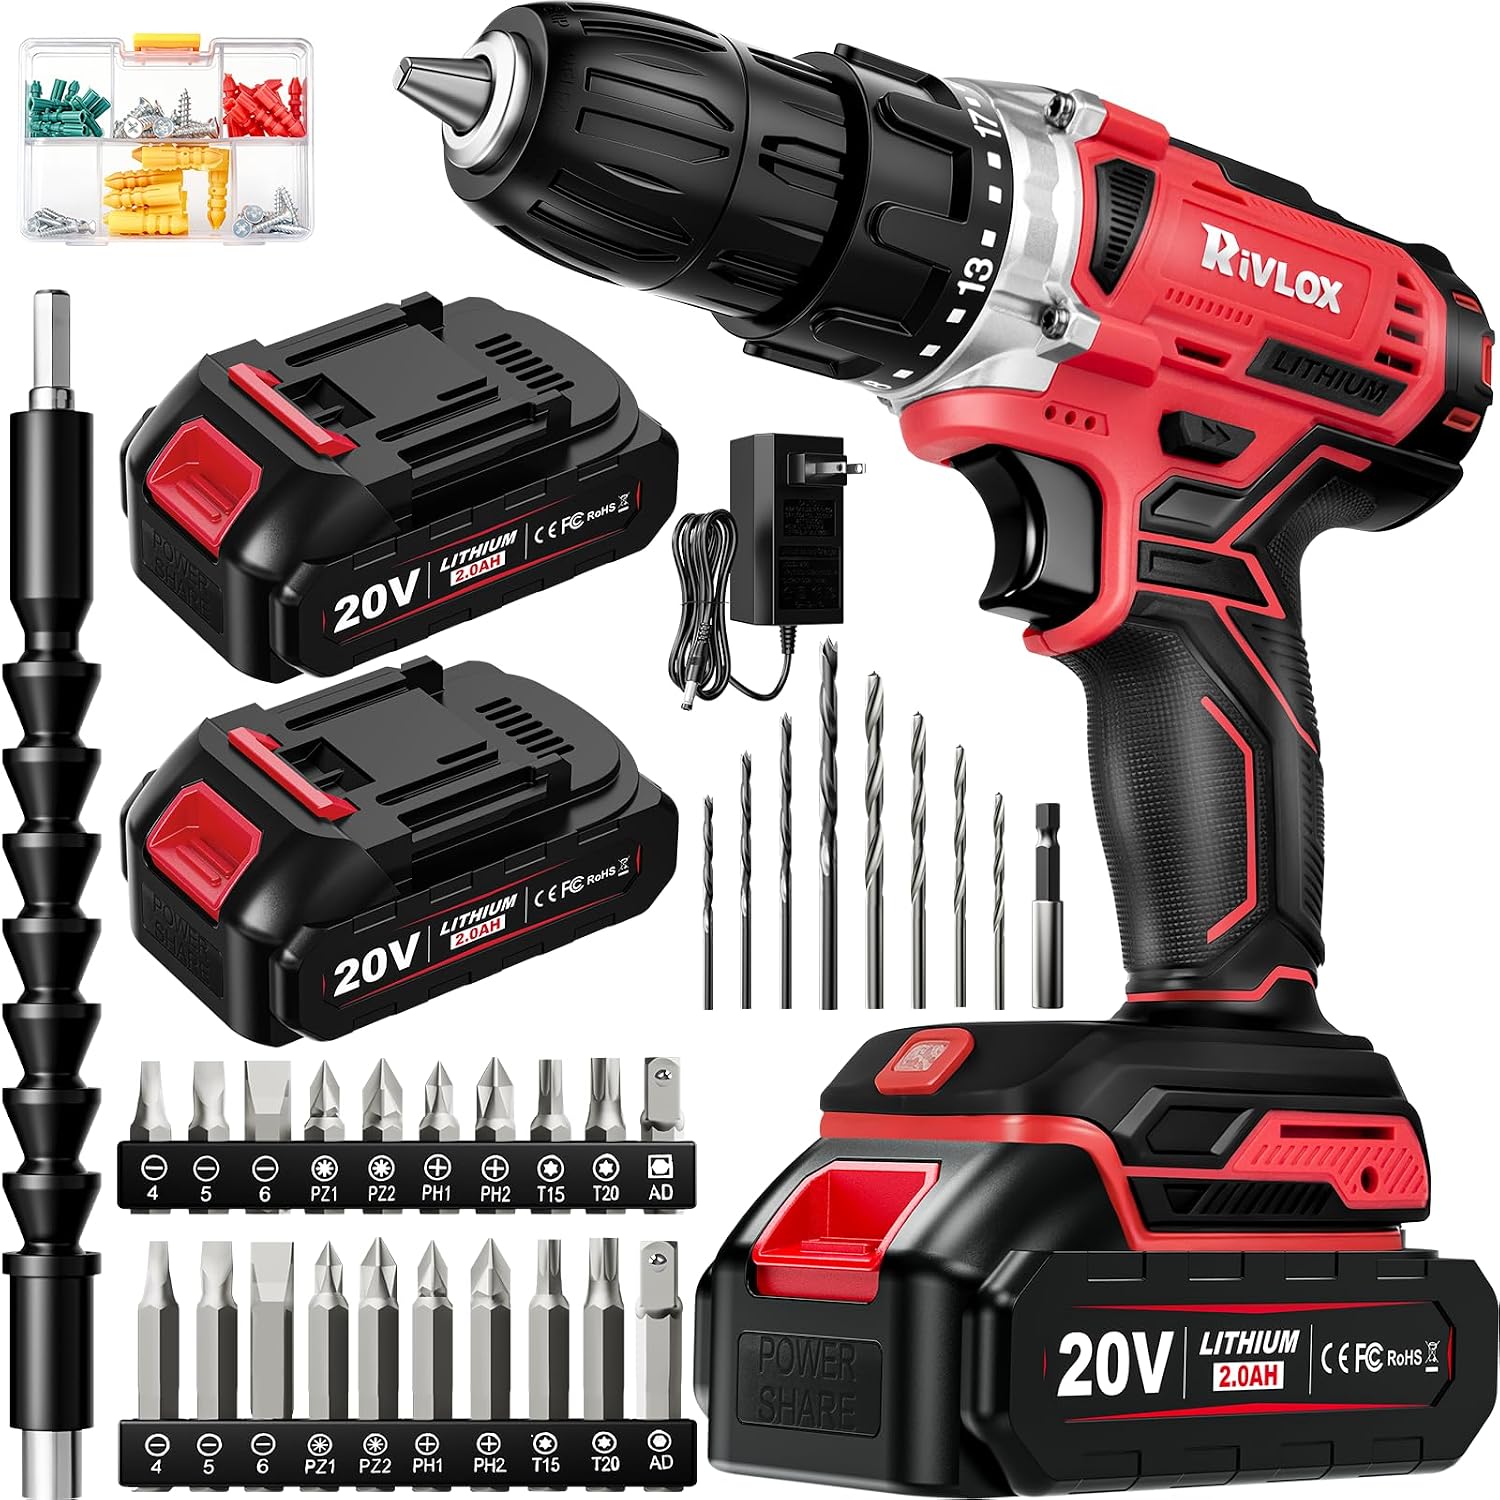
Budget pick: 20V Cordless Drill Set,Electric Power Drill Cordless,Power Drill Drivers
 Visit on Amazon →
This is the honest answer for a first drill when you own nothing. It comes as a set, which means you are not hunting for a battery and a charger on top of the tool, and for furniture assembly, curtain rods, shelf brackets, and the occasional pilot hole it does the job. Check current Amazon price before you order, because this end of the market moves around.
Flaws but not dealbreakers: This is not a deck-building tool and I will not pretend otherwise. It is built to a price, so treat it as a starter kit that teaches you what you actually want, not as the last drill you will ever buy. If your projects are bigger than a weekend honey-do list, keep reading.
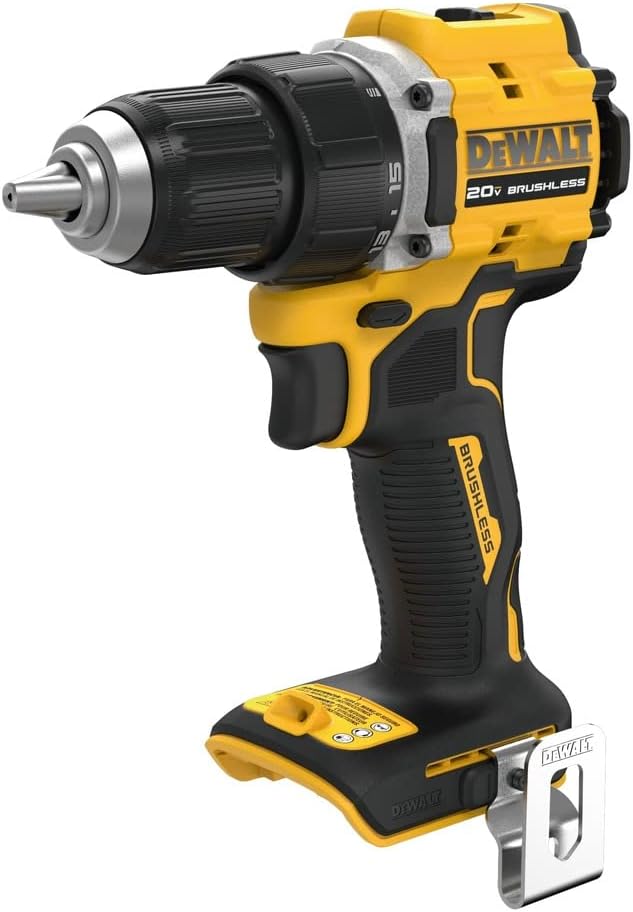
Our pick: Dewalt DCD794B 20V MAX ATOMIC COMPACT SERIES Brushless Lithium-Ion 1/2 in. Cordless Drill Driver (Tool Only)
 Visit on Amazon →
This is the drill I point serious first-timers at. It is brushless, it is compact, and it carries a 1/2 inch chuck, which is the size that holds big bits without complaining. The Atomic line is built to fit in tight spots, and the 20V MAX platform is one of the deepest battery families in the business, so the tool you buy today is still supported by batteries, chargers, and bare tools years from now. Check current Amazon price before you buy.
Flaws but not dealbreakers: The listing is tool only. There is no battery and no charger in the box, so if you are starting from zero you have to add those to your budget, and that is the one place the math can sting. If you already run 20V MAX batteries on another tool, this is close to a no-brainer.
How to set up your first cordless drill, step by step
Step one: charge the battery all the way before the first job. A battery that has been sitting on a shelf since the factory is not ready. Put it on the charger until the light says full, and do it the night before, not ten minutes before you start.
Step two: set the clutch before you drive a single screw. Find the numbered collar behind the chuck. Start in the middle of the range, drive a test screw into scrap, and dial down until the clutch starts to slip right as the screw seats. That setting is your drywall and cabinet setting. Crank it to the drill symbol only for actual drilling.
Step three: pick the right mode. Most drills give you a drill mode and a drive mode, and some add a hammer mode. Use drill mode for holes, drive mode for screws. If your drill has two speed ranges, use low gear for driving and high gear for small holes. Running a screw in high gear is how you strip heads.
Step four: match the bit to the screw. A bit that wobbles in the screw head is a bit that strips the screw head. Phillips bits come in sizes, and the wrong size is the number one cause of cam-out. If a bit starts slipping, swap it instead of pushing harder.
Step five: drill a pilot hole in hardwood and near edges. In softwood you can often drive straight in. In hardwood, or anywhere within an inch of the end of a board, drill a pilot hole a size smaller than the screw shank. It sounds like extra work until you split a good board and learn the lesson the expensive way.
Step six: let the tool do the work. Leaning on a drill does not make it faster. It overheats the motor, burns through the battery, and rounds out screw heads. Steady pressure, straight wrist, patience.
Step seven: check the chuck every so often. Tighten with all three jaws, and if the bit slips under load, stop and re-tighten. A chuck that slips on day one is a warning sign, and a chuck that slips after 200 bit changes means it is time to look at a better tool.
Step eight: take care of the battery. Do not leave a battery in a freezing truck overnight if you can avoid it, and do not leave it sitting on the charger for weeks. Charge it, pull it, store it indoors. That habit alone adds years to a pack.
How to choose between these two
If you own nothing, buy the set. You get a working drill this weekend, and you learn what you like and hate before you spend real money on a platform.
If you already own 20V MAX batteries, buy the DeWalt. You skip the starter kit entirely, and you get a brushless compact drill with a 1/2 inch chuck that will handle everything a homeowner throws at it, including the deck you keep telling yourself you will rebuild.
If you are somewhere in between, ask one question: will I still want this battery system in five years? If the answer is yes, spend up now. If the answer is no, buy the set and treat it as tuition.
What to skip when you buy
Skip the 200-piece bit sets. Ninety percent of those bits never touch a screw, and the ones that do are made of cheese. Buy the four or five sizes you actually use and replace them when they wear.
Skip the "pro-grade" sticker. Every box in the aisle says professional. Almost none of them survive a weekend of real work, which is why I keep a wall of dead tools as my review system.
Skip off-brand batteries for a platform tool. A cheap pack that lies about its capacity will cost you more in ruined work than it saves.
Skip the corded-versus-cordless argument for now. A corded drill still has a place in a shop for the jobs where batteries will not cut it, but for a first drill, cordless is what you want.
What this actually costs
Check current Amazon price on both tools before you decide, because the honest comparison is not the sticker on the drill. It is the sticker plus everything the drill needs to run.
The set is the lower cost of entry because the battery and charger are part of the package. The DeWalt is tool only, so the drill itself is the beginning of the bill, not the end, unless you already own batteries that fit it.
Over five years the math flips. A brushless tool on a deep platform spreads its cost across every bare tool you add later, and that is the difference between buying once and buying twice. That is the whole argument, and it is the one I make to every homeowner who asks.
The bottom line
A first cordless drill is a ten-year decision disguised as a weekend purchase. Buy the chuck and the battery platform, not the torque number. Set the clutch before you drive anything. Let the tool do the work.
Do those three things and the drill on your bench will still be there when the next project shows up. That is the job. Your drill was built to do it.